Overview
When your team uses AI agents (Claude, GPT, Cursor, Copilot, or custom agents), those agents often need to read contacts, update deals, create notes, or manage tasks in your CRM. OneCLI sits between the agent and Attio's API, injecting credentials on-the-fly and enforcing fine-grained permissions per agent.
With OneCLI + Attio, you can:
-
Let AI agents query contacts, companies, and deals without giving them your API key
-
Scope each agent to specific operations (e.g., read-only CRM access for a research agent, read-write for a sales automation agent)
-
Connect multiple Attio workspaces and route requests to the right one
-
Monitor every API call agents make to your Attio workspace in real time
-
Revoke access instantly without rotating credentials
OneCLI handles OAuth token management, automatic token refresh, and credential encryption. Your team connects once and agents get seamless access.
How it works
-
Connect your Attio workspace - From the OneCLI dashboard, click "Connect" on the Attio integration. You'll be redirected to Attio to authorize access. OneCLI requests only the scopes you've approved.
-
Assign permissions per agent - Each AI agent in OneCLI gets its own API key. You control which Attio operations each agent can perform. For example, allow one agent to read contacts but block it from deleting records.
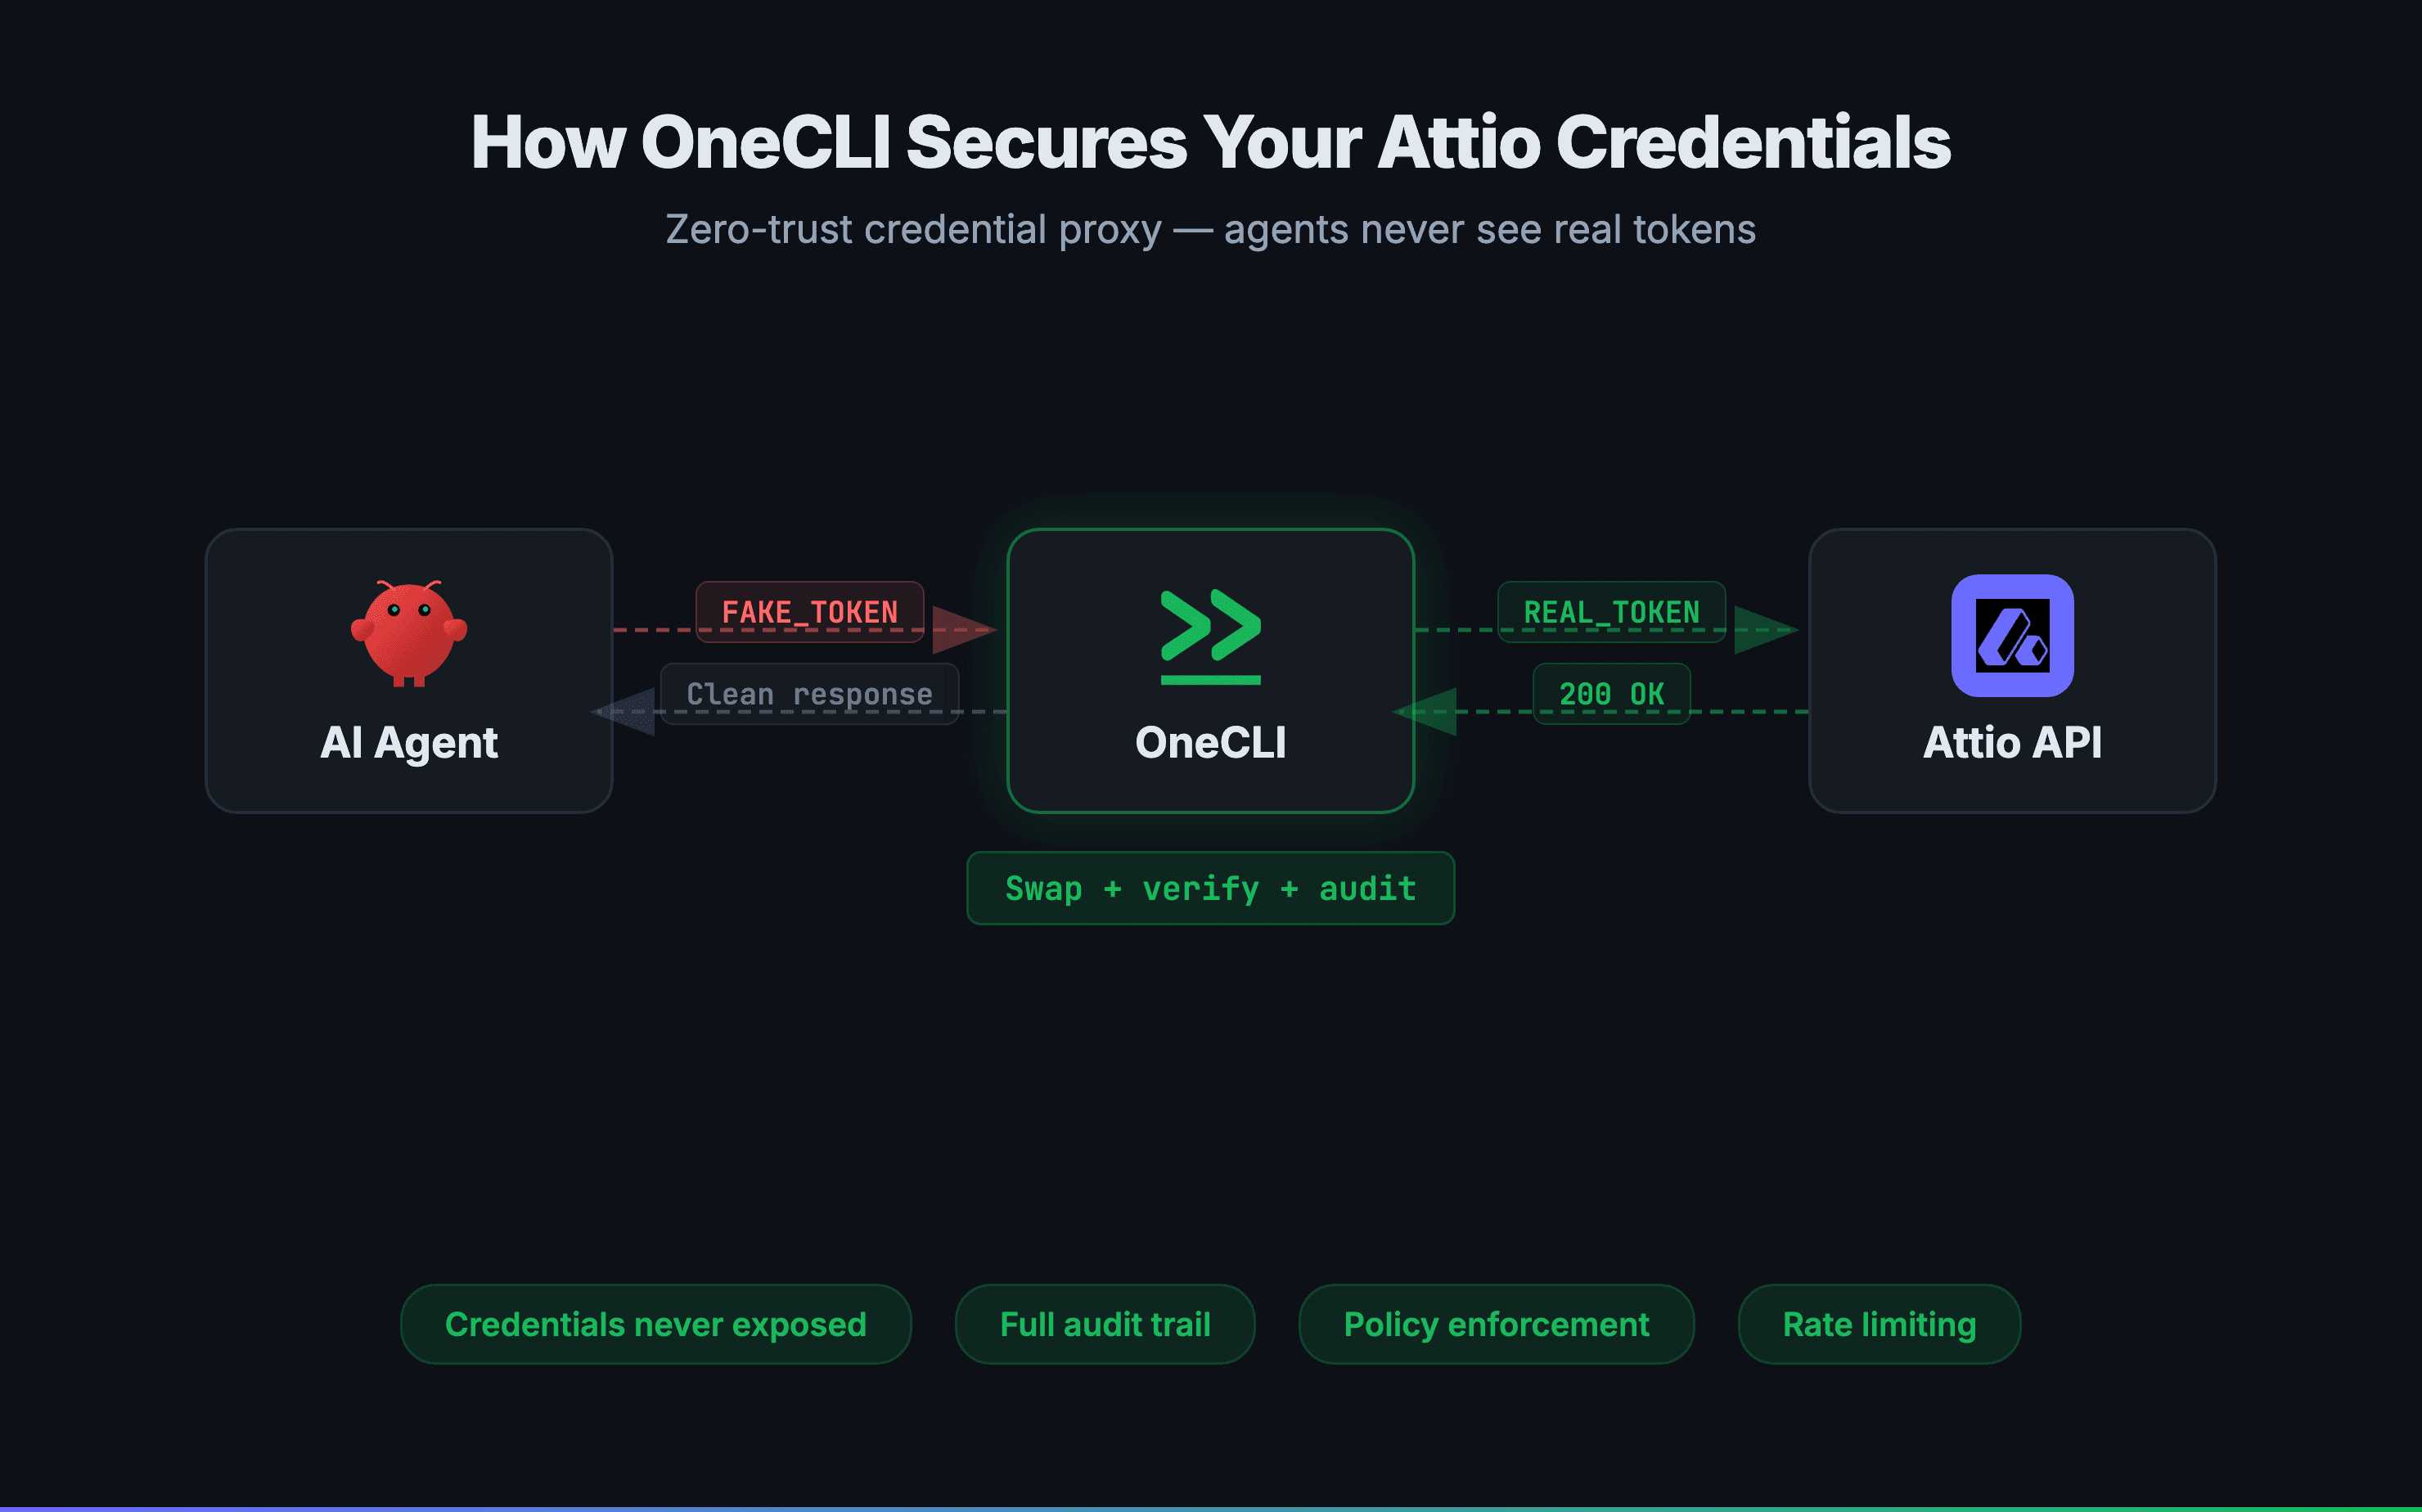
-
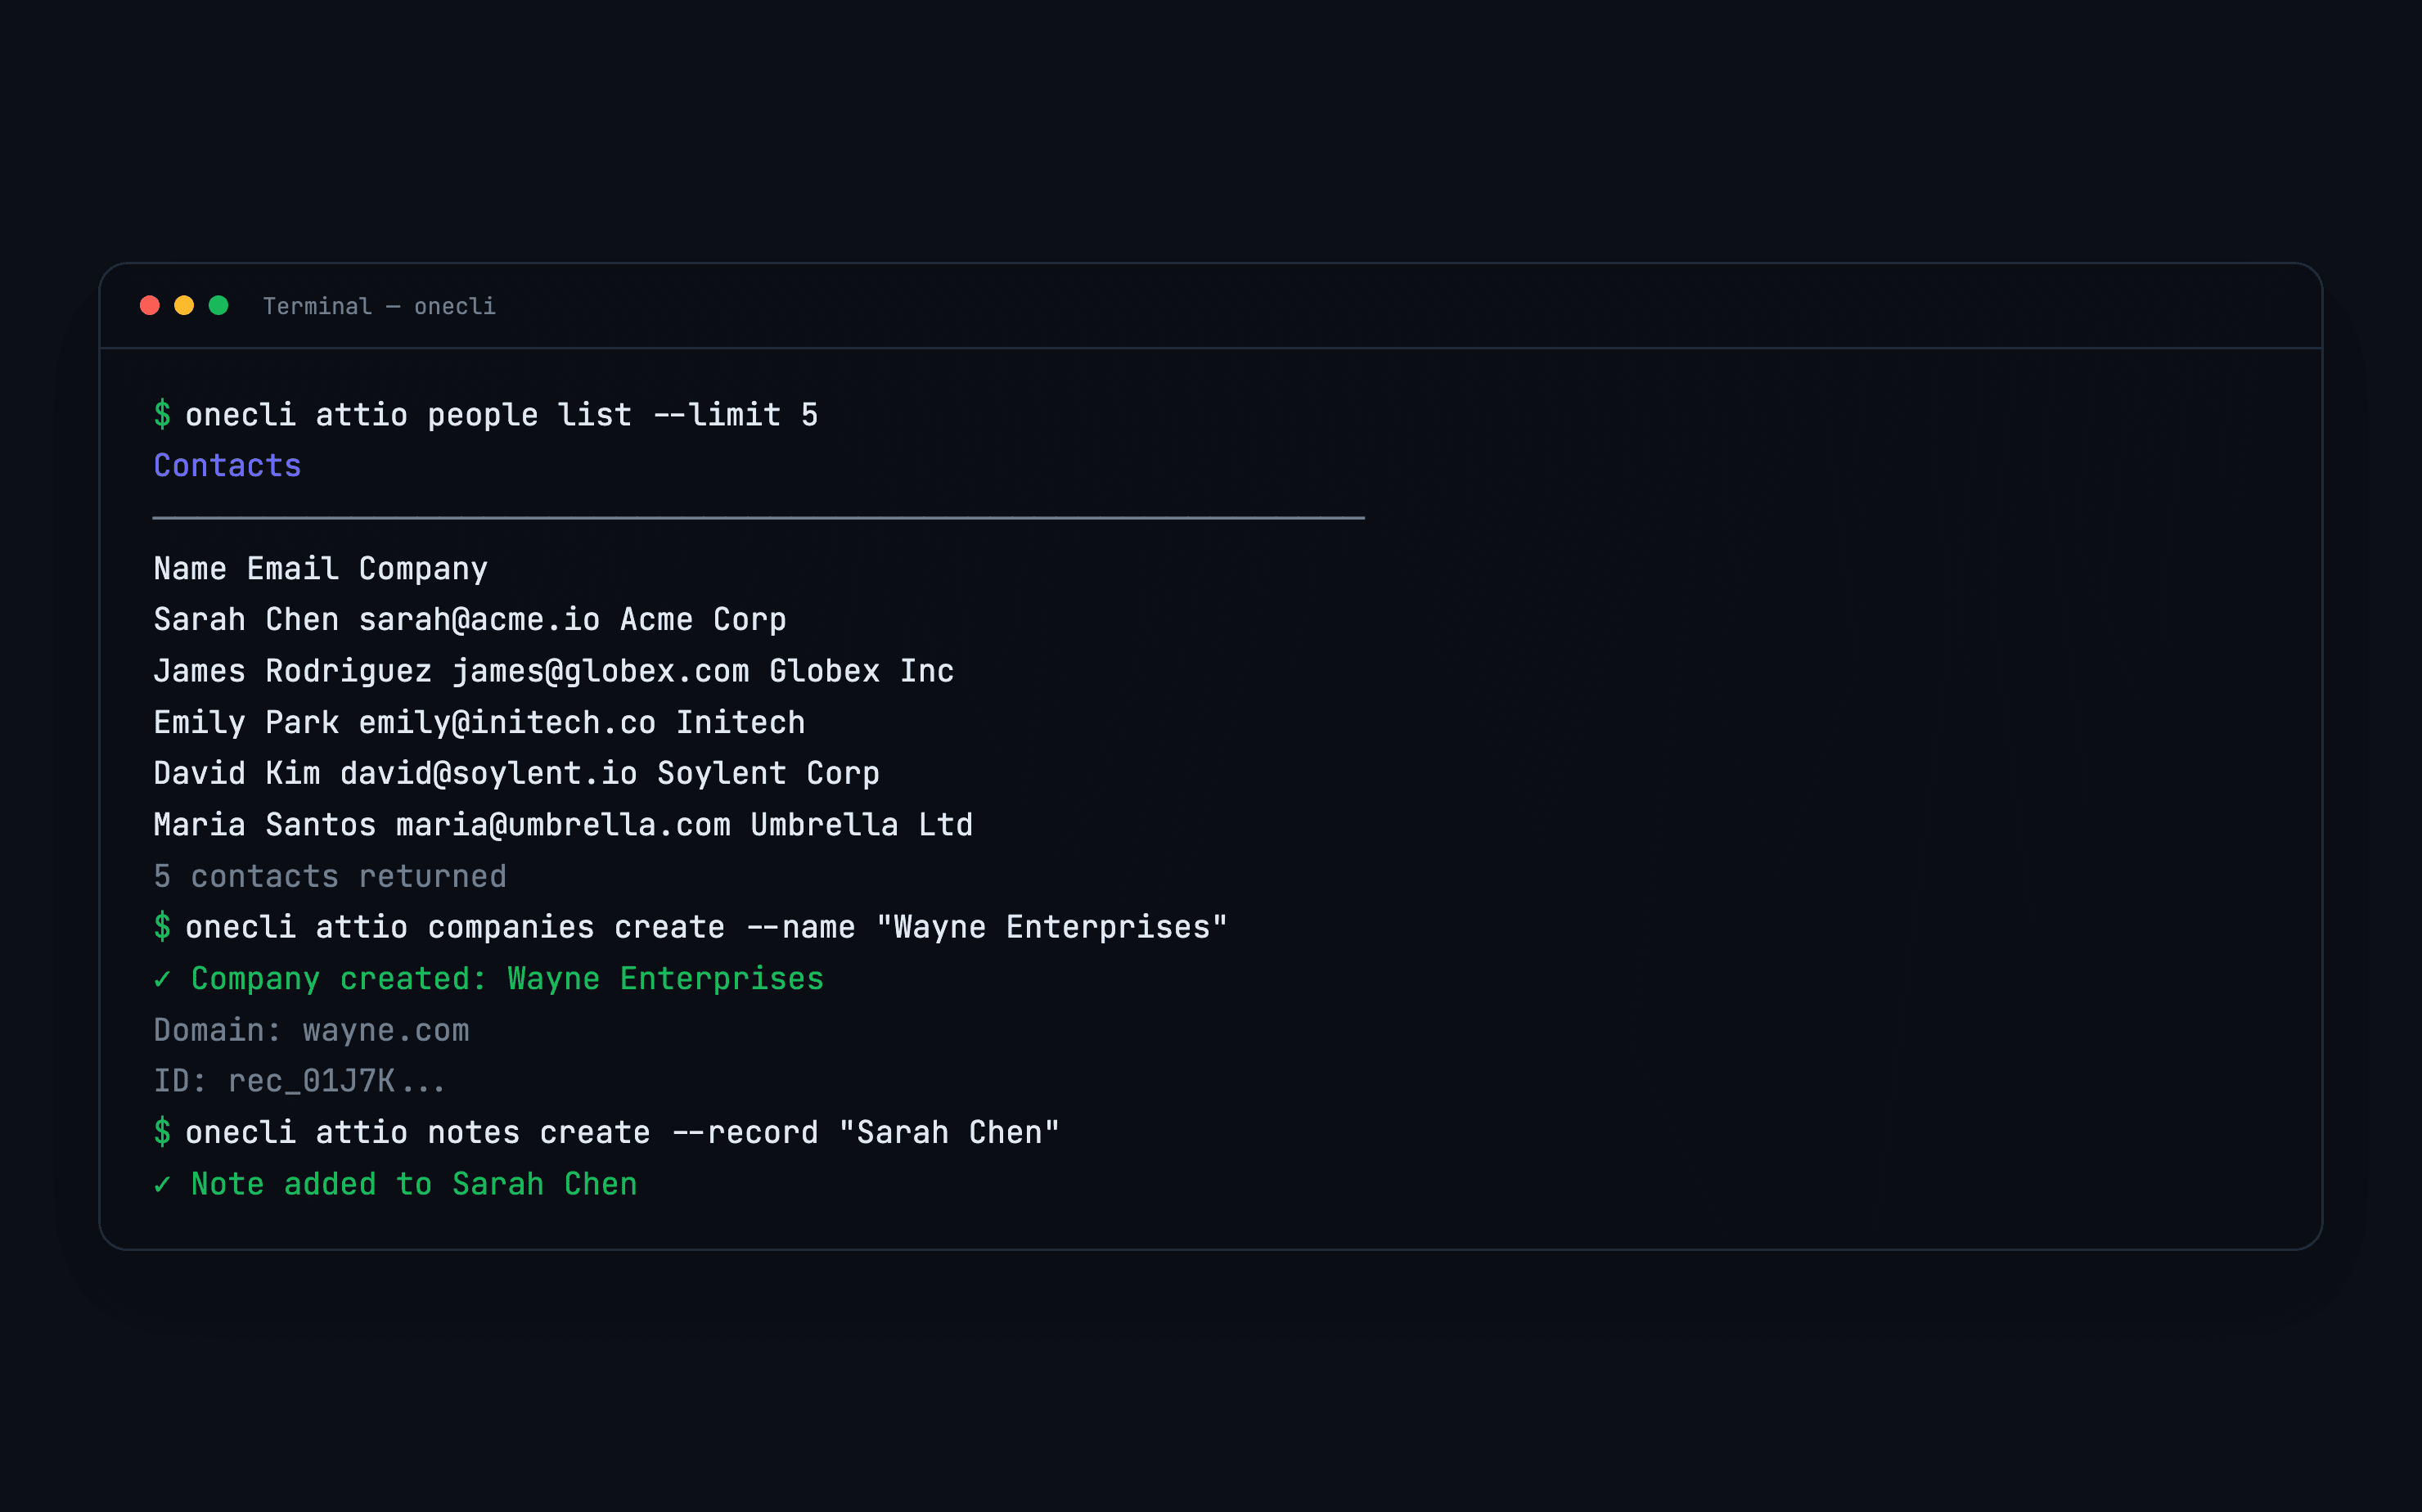
Agents call Attio through OneCLI - Instead of calling api.attio.com directly, agents route requests through the OneCLI gateway. The gateway injects your Attio credentials into each request, enforces permission rules, and logs the call.
-
Automatic token refresh - Attio OAuth tokens expire after about 1 hour. OneCLI's gateway automatically refreshes tokens before they expire, so agents
never encounter auth errors.
- Monitor and audit - Every API call is logged with the agent identity, endpoint, method, and timestamp. Review activity in the OneCLI dashboard or export logs.
Configure
Navigate to the Integrations page in your OneCLI dashboard. Find Attio and click "Connect." You'll be redirected to Attio to authorize OneCLI. Sign in to the Attio workspace you want to connect and approve the requested permissions.
Step 2: Configure agent permissions
After connecting, go to the Attio integration detail page. You'll see toggleable permission groups (Records, Lists, Notes, Tasks, etc.). Enable the permissions each agent needs. By default, all permissions are granted. Narrow them down per agent for least-privilege access.
Step 3: Use with your agents
Give your AI agent the OneCLI API key (starts with oc_). Configure the agent to route Attio API calls through the OneCLI gateway. The agent makes standard Attio API calls and OneCLI handles authentication transparently.
Bring Your Own Credentials (optional)
If you prefer to use your own Attio OAuth app instead of OneCLI's shared app, go to the Attio integration settings and enter your Client ID and Client
Secret. OneCLI will use your credentials for the OAuth flow and token refresh.
Disconnecting
To revoke OneCLI's access, click "Disconnect" on the Attio integration page. You can also revoke access from Attio's side in your workspace settings under Connected Apps.