Overview
This template could be crucial for turning your free plan users into paying customers. While this data may seem like a mere statistic, it is often a powerful signal for increased interest. This workflow will help enhance your customer relationship game and make sure no deals slip through the cracks.
Prerequisites
We have put together a list of prerequisites that are recommended for this workflow. This will be different depending on your usage, but you can use it for reference.
A Workspaces object chosen that includes:
Billed Seat Countnumber attributeSubscription Statusstatus attributeProduct Packagestatus attribute
A Customer Success list that includes:
Expansionstatus attribute
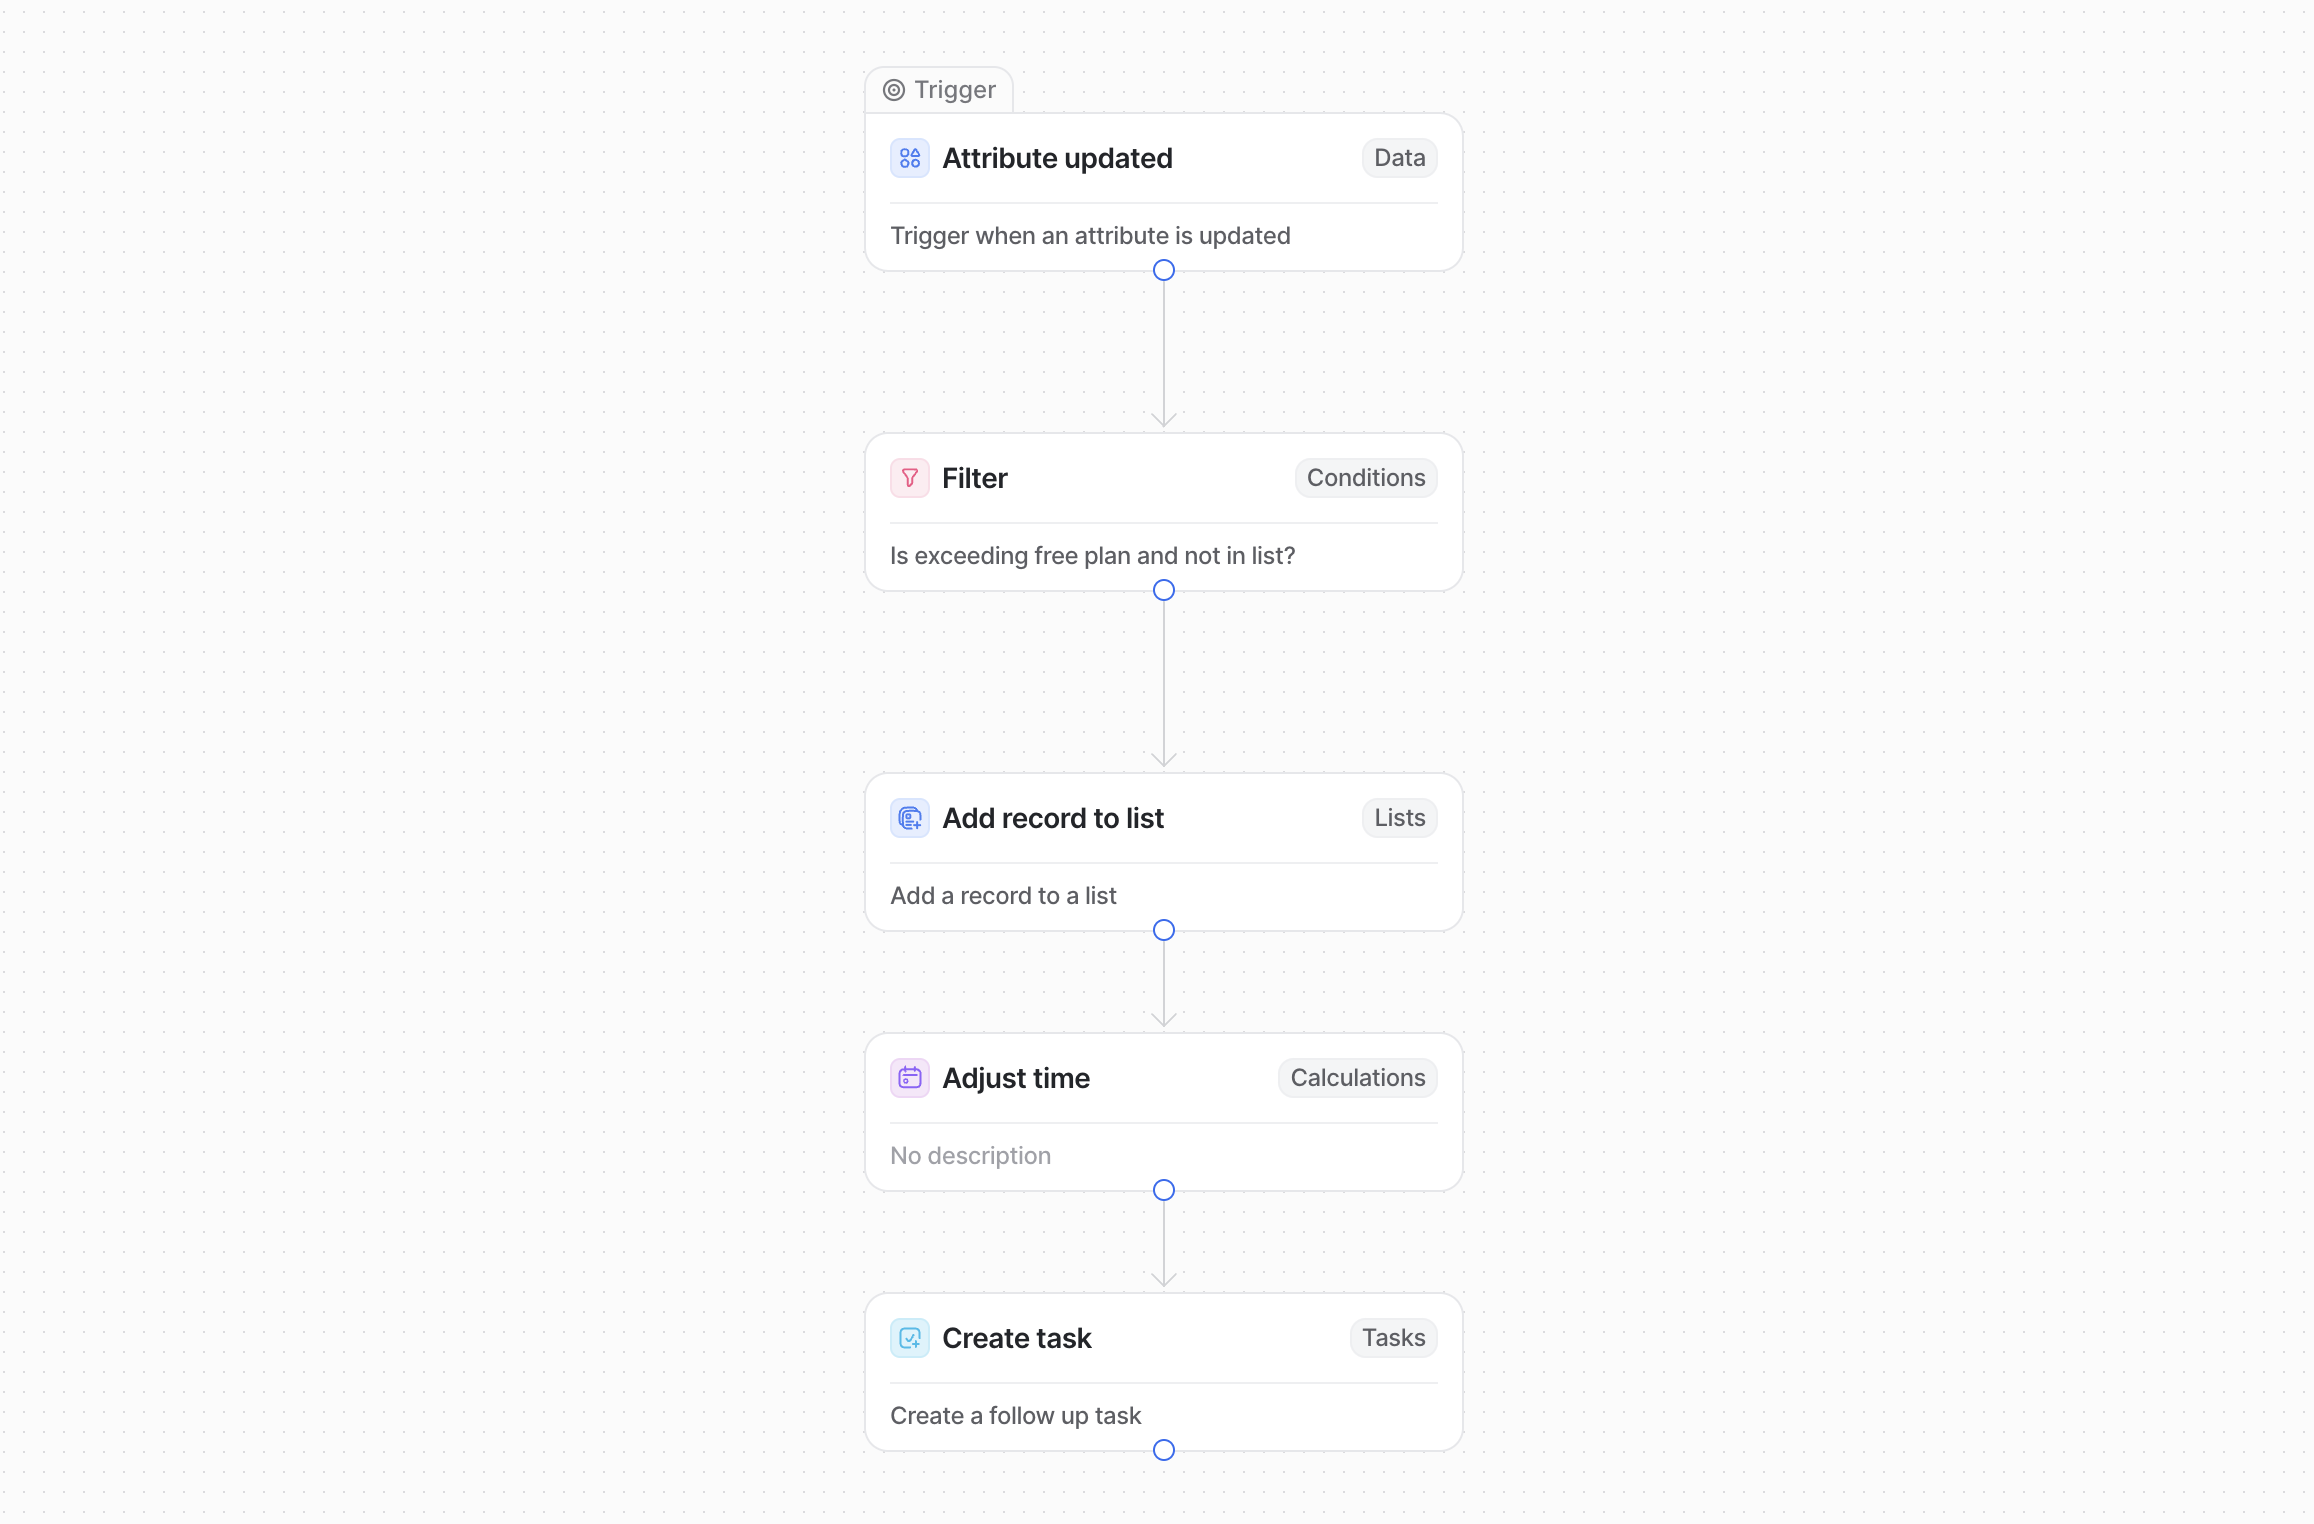
How to use this template
Once opened, you will see a series of connecting blocks.
The Attribute Update block will be activated every time you update the seat count attribute of the records in your Workspaces object. To make sure this is set up correctly, we will need to select the Workspaces object and the attribute used to track an account’s billed seat count.
The Filter block decides which customers get passed to the next block. This is where you set the criteria for the accounts that have exceeded their free plan. Here is an example series of filter input to make sure this workflow checks for the right accounts:
{Record} > {Product} [is] “Free”
AND
{New Value} [greater than] x AND
{Record} > {Subscription Status} [is] “Active”
AND {Record>List Entries} [not contains] “Customer Success”
The purpose of these three filters is to check that the workspace record is currently on a Free Plan, has an
Activesubscription status, has exceeded the number of seats given on their Free Plan, and isn’t already in the list you’re adding to. These can all be adjustable to your own use.The Add Record to List block is where you select a list for all filtered customers to be stored. These are customizable and you can pre-set items including the stage that these customers will be placed in and their primary CSM. For our workflow, we have directed these filtered customers to the Customer Success list and set our stage as
Expansion.The Adjust Time block allows you to offset the recorded cancellation date by one day. This will give the assignee a good amount of time to reach out. In this block, you can input any number (e.g. 1 day) that you see fit. Both the numbers and the unit can be changed.
The Create Task block automatically assigns a task to your Primary CSM, prompting them to reach out to the customer their product package. You can set it by giving it a task description, due date (
{Adjusted Timestamp}), assignee, and a linked record. The linked record represents the customer that needs to be reach out to. Here is an example series of input for this block to run properly:Task: Follow up with customer about their product plan. Due: {Adjusted Timestamp} Linked Records: Entry > {Record} Assignees: Entry > {Primary CSM}